A Perfect Bride

Hello crafty friends. I have several weddings coming up this summers so I thought it was time to start getting some of my wedding cards completed.  Several of my family members are going to the wedding, so I am tasked with coming up with different card designs for each of us to use. 


I love this image from I Brake for stamps called Silhouette Bride. It is a classic image that can be used again and again. 

I started out by stamping my image onto some card stock using my stamping platform. I then fussy kit the image.  I wanted the background to have some texture, so I embossed some white card stock and added some lace.

I added a simple sentiment as well. There are several images available that would be great for wedding cards. Be sure to check out this section and don't forget if you use my coupon code SAVE10MONICA, you will get 10% off. 

Thanks for stopping by!


For the Birds - STAMPlorations - Second Spotlight Post

Hi everyone! I am back this month to share with you another project I created using the stamp set called "For the Birds".   My design for this card came to me after reading the Faith sentiment from this stamp set.  Within the sentiment it says "the bird that feels the light" and I knew exactly what I wanted to do.


I couldn't decide what image to use for my design, so I decided to create four note cards. To begin, I pulled out my Rays stencil from Tim Holtz and added added some distress paint Mustard seed over my stencil.  When I am making sets, I usually do the same step for each card. It makes the assembly line go much smoother. 


Stenciling all four of my cards all at the same time gave my first cards time to dry. I was planning on stamping over my paint, so i needed to ensure the paint was completely dry. 


I then added some washi taype and outlined it with a black distress crayon.  I also added some orange distress crayon to my rays and smeared it in with a wet baby wipe. 

The washi tape created a nice perch for my birds so that they didn't look like they were floating in air. I first stamped the sentiment on all four cards. I used my stamping platform which made the stamping go very quickly.


Then I stamped each card with a different bird image. I love how each card is a bit unique, but they create a great note card set.

Don't forget to use STAMPGIRLMONICA to get 20% off over at STAMPlorations.

Thanks for stopping by!


How to create a Passport Book - Birthday Giveaway!

Hello crafty friends! If you have been following me for a while, you have seen my passport cards and books. These things seem to be so popular around the holidays I decided to get a jump start on creating some for my etsy shop.


After I posted my share on you tube, I got many requests to show how I put these books together. Below you will find both videos on my process. 

Part 1

Part 1 describes my thought process and organization for putting together this book. It also walks you through creating the outside of the book.

Part 2 walks you through decorating and binding the book. I also share with you some of the items and my process for creating pockets and tucks for all the fun ephemera I add to my passport book. 


Part 2


What I love about the passport books are that they can be decorated to fit any theme. While my first passport books were focused on travel themes, Over the years I have created these books using many themes and for many occasions to include Halloween, birthday, baby showers and Christmas.  I have even made Polar Express theme'd books. 


I thought the videos would be a good reference for my kits that I am offering in my shop. If you feel a kit is just too ambition, you can always purchase a book that is already created. All you need to do is enjoy it!


To celebrate my birthday, I am also doing a giveaway to 4 subscribers on my you tube channel. I will be giving away:

1 $15 gift certificate to Canvas Corp Brands
1 $15 gift certificate to Scrapbook(dot)com
2 Passport book Kits

Thanks for stopping by!


No Desire to fit in!

Hello crafty friends. I am here sharing a card I created with a sentiment that I just love.  As a crafter and designer, it is often difficult to find your style. Many times we conform and just try to "fit in".  

I have tried so hard to stay true to my style of crafting, and to continue to grow in my style of creating.


The city scape stamp that I am using today is from I Brake for Stamps and is called Full Sheet Travel. It also has the great block letters that i used to spell out CITY. 


The little vintage gentleman is called man facing left. He was a great addition to my City scene and i love how he is looking up at those tall skyscrapers! 

Don't forget you can save 10% by using coupon code SAVE10MONICA over at I Brake For Stamps!

Thanks for stopping by!


Passport Books

Hi everyone! i am popping in to share with you what I have been working on over the last couple of weeks.  I was invited to be a guest artist over at a local Farmers Market in July, so I am building up my inventory. 


My passport books are always so popular during the holidays, this year I decided to be smart and make several ahead of time.  So yes there is a reason i am working on Halloween projects already!


If you want a tour of my passport books, you can check out the video below.  I am also working on a tutorial on how to put these fun books together and hope to get it published next week. 


I also have them listed in my etsy shop for those early Halloween planners! Each book has unique ephemera and fun journaling cards. There are even pockets for gift cards and room for pictures.

Hope you enjoy them!

SUPPLIES
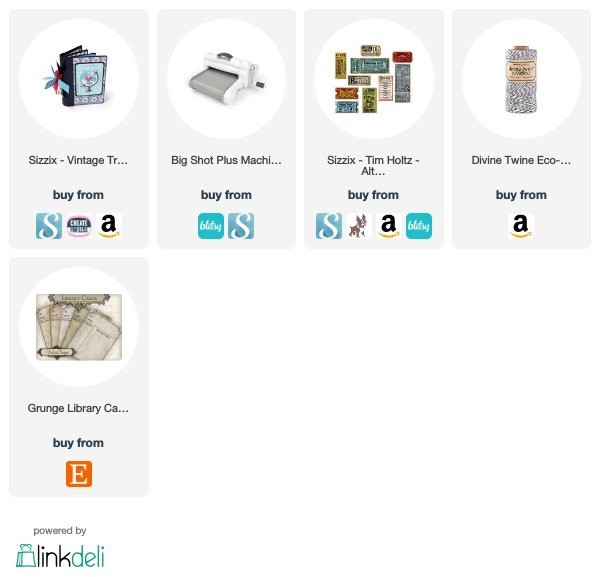
Want to find the products I used? I have listed them below. (Compensated affiliate links used at no cost to you. Thank you!  All products were personally purchased and my post was NOT paid for or sponsored.) Click on the icons below each product picture to go to a favorite store.

STAMPlorations - Things with Wings

Hi everyone! I am here sharing my mid month inspiration for our Things with wings Blog hop and link up party.  

For my project, I am using the {Faerie Door} stamp set. Isn't it fun?


Create any type of project (cards, ATCs, layouts, or whatever you want) as long as it's got something with wings in it.


You don't have to use STAMPlorations products to join along, so there is no excuse. . Use whatever you have in your stash...although we are always excited when we see STAMPlorations products in projects entered in our challenges!

Link back:

If you play, make sure you include the graphic above in your post and link back to the challenge post in order to qualify for our prizes. I have listed the simple rules below for your convenience.

Inspired to create your own projects? Link up below! Please just keep in mind these simple rules:
  • Create a project based on the theme, Things With Wings.
  • Your project(s) can be anything.
  • Link up as many projects as you wish as long as they are in separate blog posts.
  • Your project photo must be posted in full in your blog post! Please don't link up to our challenge if you're only showing a sneak peek of it (as is the case when you made it as a design team project for another company). In the same vein, please do not link up your project if it's solely to promote another company.
  • You must display the challenge graphic below in your post and link back to this post (not just the main blog) in order to be eligible to win (and receive the corresponding prize).
  • Link up by May 31, 11:55 p.m. Pacific time.

Prizes:
  • The winner (as voted by the design team) receives a $15 gift certificate.
  • The two (2) top picks (randomly drawn) each receives a $5 gift certificate
  • Comment on this post and on the designers' posts for a chance at winning one of several surprise prizes.

Thanks for stopping by!


Sister Birthday Card

Hi everyone! My sister celebrated a birthday a few days ago and I wanted to share with you the card I created for her. 

I used one of my new stamps from visible image called Sister Definition.  


To see my process video, you can click on the link below. 


I decided to create a grungy black and white card using some die cuts, stamps and texture paste. For one of the cards, I used white texture paste which created a more subtle background.


For the second card, I used black texture paste, which resulted in a darker background. 


Both cards also had some black and white washi tape from Prima marketing. I stamped the Sister definition stamp with some white pigment ink and added white embossing powder.  I also added a black butterfly to the darker card as an added embellishment.


Overall, I was happy with the way both cards turned out, but I did end up sending my sister the card with the lighter background.  

Thanks for stopping by!


SUPPLIES
Want to find the products I used? I have listed them below. (Compensated affiliate links used at no cost to you. Thank you!  All products were personally purchased and my post was NOT paid for or sponsored.) Click on the icons below each product picture to go to a favorite store.

Faux Cabinet Cards

Hello Crafty friends. I was recently watching a you tube video where someone created a mock Cabinet Card. This of course got my creative juices flowing!


I re created the background of this old Cabinet Card so that i could stamp my image. The stamp that I am using is from I Brake for Stamps called Happy Couple and it is part of there "Photo" collection.


It took me several tries to get the sizing just right. I used Pic Monkey to help re create this background. 

Once i had the perfect creation, I downloaded it and re sized it on my computer. I then printed it out and stamped my image.

This card was a lot of fun to create! Hopefully I have given you some ideas for your vintage cards.

Don't forget you can save 10% by using coupon code SAVE10MONICA over at I Brake For Stamps!

Thanks for stopping by!


Altered Cheese Cutter Board

Hi everyone and Happy Mother's Day!  Today I am sharing an altered Cheese Board I create using a board I found at a local thrift shop.  One of my favorite things to do on the weekends is to browse local thrift shops for items to alter. To me it is like a treasure hunt and I never know what treasures i will find!


What caught my eye on this cheese board was that the ceramic insert was missing. This made the perfect insert for a scene. 

To see a closer view of this altered item, you can check out the video below. 


To begin, I painted the entire board with Old Bronze Color Wash paint.


Then I covered the background with some cardstock using ModPodge.


I wanted to have several layers, so I build them up using various metal objects, Idea-ology items, Trinkets from Architextures and items from the Junque Packs.


I didn’t want the cheese slicer to move so I found a mini ruler that I glued over the slit to keep the slicer in place. I then added a metal object. I also added the Vintage sign shop to the top of the cheese slicer.


SUPPLIES
Want to find the products I used? I have listed them below. (Compensated affiliate links used at no cost to you. Thank you!  All products were personally purchased and my post was NOT paid for or sponsored.) Click on the icons below each product picture to go to a favorite store.

Alcohol Inks & Visible Image stamps

Alcohol inks have been hitting social media craft pages everywhere, but this is not a new product.  But with any product that comes back in style, there are always new techniques introduced.


While these may not be new to you, I had a lot of fun playing and experimenting with my inks.


If you would like to see my process video, you can click the link below. I had a lot of fun experimenting with my inks and I hope to give you some ideas. 


I love the colorful background that I was able to achieve using the alcohol inks and regular gloss card stock. I know that many people have used Yupo, but I have not tried that product as of yet. 

I stamped my card using black archival ink and used some black washi tape from Prima Marketing to help ground my image.  I then added some black texture paste.


The stamps I was using were from Visible Image and are clear Photopolymer stamps.  These can be a little tough to stamp on glossy paper, but it could have been simply because the stamps were knew and had  not been conditioned yet. 


After I finished working on my backgrounds, i created three cards. I had a lot of fun playing and just love how the backgrounds turned out.


SUPPLIES
Want to find the products I used? I have listed them below. (Compensated affiliate links used at no cost to you. Thank you!  All products were personally purchased and my post was NOT paid for or sponsored.) Click on the icons below each product picture to go to a favorite store.


Grungy Mother's Day Card

Hello Crafty friends. I am here today sharing a card I created for Mother's Day. This card was so fun to create as I love creating grungy cards. 

I used the Grunge Letter Flower and Grunge Circle stamps from I brake for stamps. The Grunge Circle stamp was perfect for my background.


I started out by adding some washi tape and distress ink to my background. I then added some texture paste using the Tim Holtz tile stencil. 

Once the texture paste was dry, I added my grunge.  I outlined my washi tape with a distress crayon and stamped my background with the grunge circle.  


I then adhered my film strip die along with my green foliage. finally, I adhered my grunge letter flowers and glued some white pearls in the center. finally, I added a ticket and letters to spell out Mom.

Don't forget you can save 10% by using coupon code SAVE10MONICA over at I Brake For Stamps!

Thanks for stopping by!


Featured Post

Challeng Winners - February & March 2023

   Hello everyone. As you may have noticed, I have been MIA for the last couple of months. Life has been very busy and it has been difficult...