Showing posts with label Mother's Day. Show all posts

Grungy Mother's Day Card

Hello Crafty friends. I am here today sharing a card I created for Mother's Day. This card was so fun to create as I love creating grungy cards. 

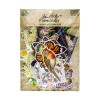
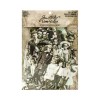
I used the Grunge Letter Flower and Grunge Circle stamps from I brake for stamps. The Grunge Circle stamp was perfect for my background.


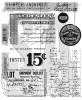
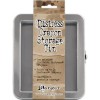
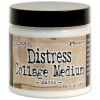
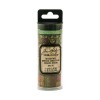
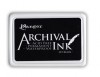
I started out by adding some washi tape and distress ink to my background. I then added some texture paste using the Tim Holtz tile stencil. 

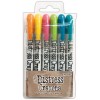
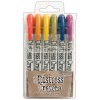
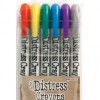
Once the texture paste was dry, I added my grunge.  I outlined my washi tape with a distress crayon and stamped my background with the grunge circle.  


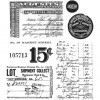
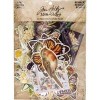
I then adhered my film strip die along with my green foliage. finally, I adhered my grunge letter flowers and glued some white pearls in the center. finally, I added a ticket and letters to spell out Mom.

Don't forget you can save 10% by using coupon code SAVE10MONICA over at I Brake For Stamps!

Thanks for stopping by!


Floral Mother's Day Card

With Mother's Day around the corner, it is never too early to start thinking about our card designs.  I love that Mother's Day is in Spring and we can use some great vibrant colors and florals in our cards.

Today I am sharing with you a card I created using the new Collage Tissue paper from idea-ology and a great textured background. 


You can see the process by visiting the video below.  Here I will give you some tips and tricks for using the collage paper along with some great Spring ephemera.


The collage paper is semi translucent and comes in four different designs. I used Floral on mine which has some beautiful colored roses and some great script background.  The three other designs are Botanical, Aviary and plain.


The background was created using the collage tissue paper as well as some texture paste through the tiles stencil.  I added Magicals to give the card some shine. 

You can see some more examples using some of the same product on a post called Floral Collage Paper

You can find a complete list of the product I used below. 

Thanks so much for stopping by!


~Links to products in this blog post may be affiliate links. This means that when you click and shop, I make a small commission at no cost to you that goes towards the upkeep of this blog and my YouTube channel.~   


Happy Mother's Day

Hi everyone! Happy Mother's Day. I wanted to share with you the card I made for my Mom this year. I am using some of my favorite products to create this fun, colorful card. 


You can see my process here on the video below. Be sure to stick around through the end of the video as I will be offering up one of the Paper Dolls sets as a giveaway over on my You Tube Channel.


Thanks for stopping by!

I am sharing my card with the following challenges:


~Links to products in this blog post may be affiliate links. This means that when you click and shop, I make a small commission at no cost to you that goes towards the upkeep of this blog and my YouTube channel.~  


MHKDesigns - February Release Day 3 - Lovely Ladies

Hello, friends! Welcome to Day 3 of MHKDesigns' February release. If you are not familiar with Mynn's designs, I invite you to head on over to the MHK Designs ETSY Store for lots of lovely vintage designs that suit all crafting styles.


Today we are sharing the third release set of five this month. This set is called Lovely Ladies and is available now in the Etsy shop


How To Win

In order to get this new set OR the entire release for FREE, here's what you'll need to do:
  1. Leave a comment on the MHKDesign Blog
  2. Leave a comment on each DT member's blog (see list below) 
  3. Join our MHKDesigners and Friends Facebook group and leave a comment there.

Asha | Asmah | Dawn | Judy | Jessica | Julie 
Monica | Mynn | Rocky | Shawna | Tasha

Mynn will randomly choose the winning comments from all these places after the release is over. The best way to win is to comment on every release.

Thanks for stopping by!


Class Picture

Hi everyone and happy Friday!  If you have been following me for a while, then you know that I love to make layered cards. This is a technique that I have learned from some of Tim Holtz' groupies.  Many people struggle with this technique, mainly because you have to have some sense of what works well together and there are a lot of pieces that go into a layered card.


I try to tell a story with my cards or inspire a past memory. We all remember "Picture Day" don't we. Let's take a trip down memory lane.

So lets break it down. The first thing that I always start with is my focal point, which is the framed girl in this card.  I cut out 2 - 3 different sized paper to matt. The first piece is about the size of a card from a deck of cards, then about a 4.25" x 5.5" then finally a trimmed piece that fits on a 5" x 7" card base.


The card stock a lot of times will help me in the direction of the theme. In this case, the base cardstock had "Oklahoma City Public Schools." It reminded me of a class photo, so there was my theme.

For my embellishments I used tickets, washi tape, film strip ribbon, and rub ons.  I didn't have a stamp that said "class picture" so I typed that up on my computer and printed it out.


I grunged it up using one of my distress crayons and the Matte Collage Medium. I have listed the products I have used below. Don't forget to leave me a comment to say "Hello."


Products I used:


Featured Post

Challeng Winners - February & March 2023

   Hello everyone. As you may have noticed, I have been MIA for the last couple of months. Life has been very busy and it has been difficult...